

If you have a table of contents, one of requirements is that the numbers of the chapters must match perfectly. However, there isn’t much point having a table of contents with page numbers if you don’t have page numbers.
Introducing: Page Numbers
This has got to be the fiddliest part of the whole exercise. Why? Because it involves headers and magical fields. There may be many ways to skin a cat, but this is how I do it. If you’ve got a better / easier / alternate way, feel free to let me know. Anything that makes life easier, right?
I put my page numbers in the header, top-left for left-hand pages and top-right for right-hand pages. You can put your page numbers at the bottom, in the footer, with pretty much the same process.
First, show the view as ‘Print Layout’. This will give you a clear idea of what is a left page, and what is a right. You should see, for example, that your first page, your Title page, is a right hand page.
Select “Insert -> Header -> Default”
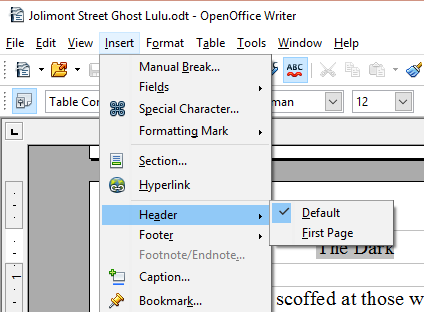
This will put a magical header at the top of every ‘default’ page. Because the Title page is a ‘First Page’, it doesn’t get this, which is a good thing because your Title Page must only have the title, the subtitle and author (no page numbers).
Numbering should start from your Copyright and ISBN page, and be consistent all the way through.
Get on with it…
Alright! Sheesh, I’m laying down the what and why and stuff. OK, so when you add your header, go to the page settings in ‘Format -> Page…’:

In the dialog. You’ll note that you can also adjust your headers and footer from here. You can also uncheck ‘same header left and right’.
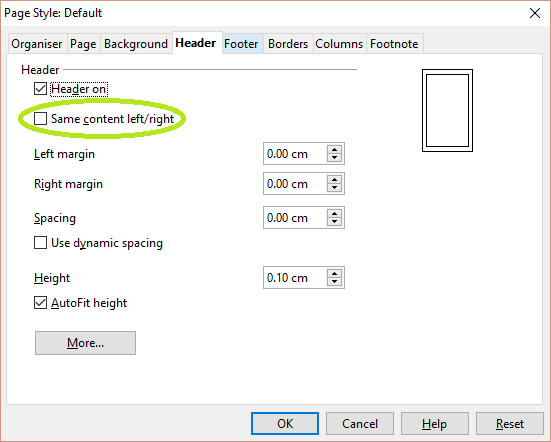
Why? Because you won’t be having the same header left and right, that’s why.
Hit OK, close the dialog and, at the top of every page, you’ll have a grey rectangle. This is your header. If there’s a big, gangly space underneath, you can adjust the header size and spacing from the page formatting dialog. At this point, if you want ONLY your page number, then ignore the next bit about tables and skip down to the next bit.
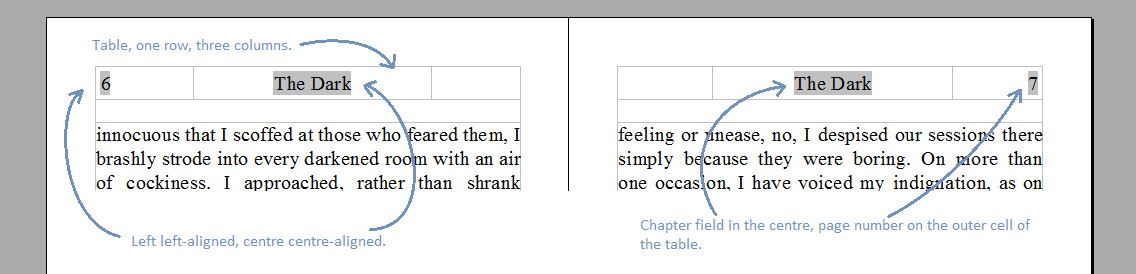
Click inside the header, and insert a table 3 columns x 1 row. You may need to format the table to remove borders. Right click -> Table Properties -> Border – and set to blank border.
Now, click in the middle cell, and go to the menu “Insert -> Field -> Other”, or hit Ctrl + F2, and select the Chapter Name from the list. This will insert the current chapter for each page. Then click ‘centre align’ to make the chapter label centred. Do this for the right header as well.
Page Numbers, finally
Now click on the left header’s left cell (or just the left header if you aren’t using a table) and make sure it’s left aligned.
Go to “Insert” -> Field and choose the “Page Number” from here.
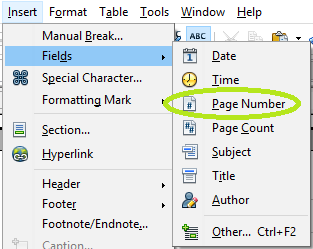
Boom. All left pages are now numbered!
On the right header, click the right-most cell, and right align it. Insert the page number there and, boom! all right pages are numbered!
It’s as easy as that. Now, because you’ve introduced a header, this can push out the contents of your pages, so the Table of Contents you created previously will no longer match. Right click on it and press ‘Update’ to realign the TOC with the pages.
If you want, you can stick your page numbers up the top, and your chapter title down the bottom, or both at the bottom. (Almost) Anything goes. Just be sure to align left page numbers to the left, and right page numbers to the right.
At this point, check that your Title page has no page numbering, that your TOC is correctly picking up the chapters and their respective pages. If it’s all good, you’re nearly there!![]()
[…] Margins, line spacing, header and footer are correct throughout. […]
[…] An ISBN, blurb and other necessities and […]
[…] that need to be met. Remember how we needed the table of contents to be correct, and the page numbers in the right spots, and Copyright and ISBN to be valid, and the cover to be up to […]
[…] After this, I need to add in page numbers and chapters. I won’t reiterate that, since you can see how I did that here. […]