
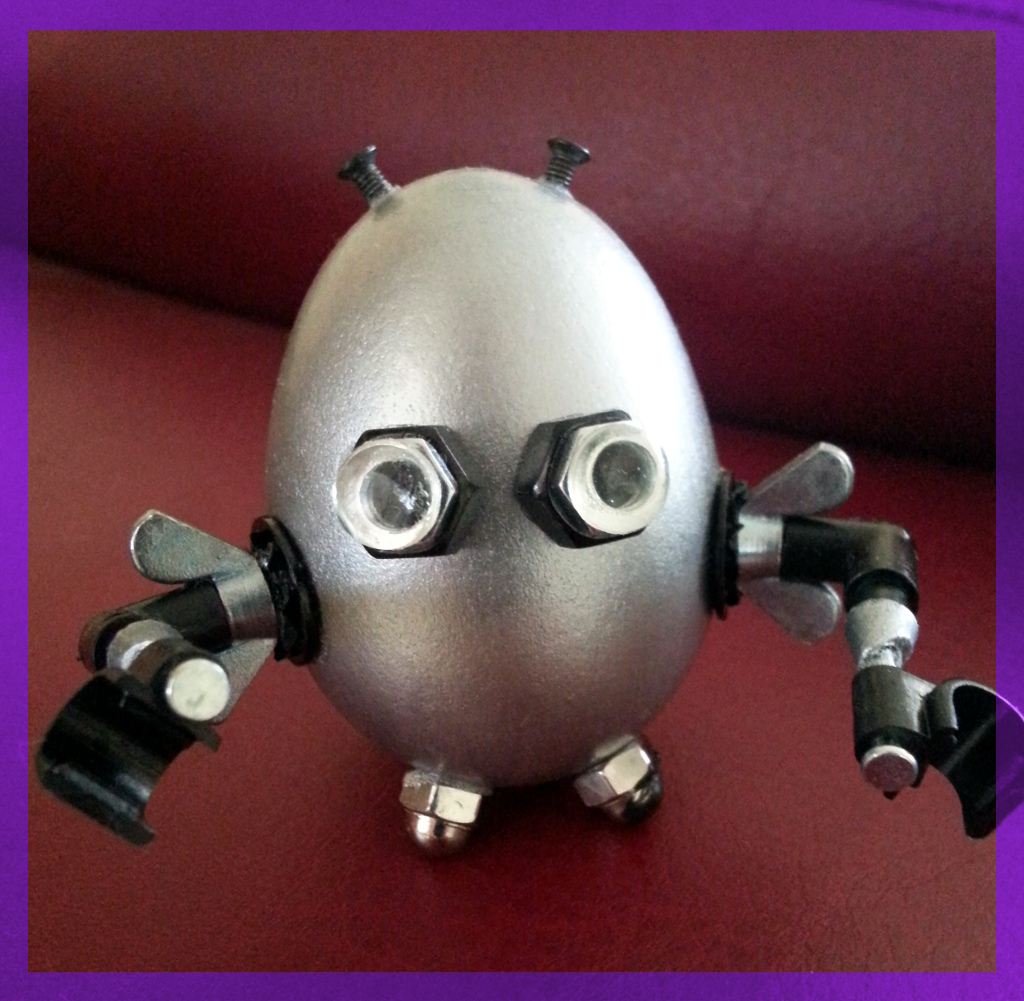
This is a crowd-pleaser. Not only is it cute, not only can it stand on its own two feet (yes, it has feet) but it’s fully customisable. The limit is only determined by what bits and bobs you have on hand.
Body and feet
Blow your eggs, undercoat and paint a solid metallic colour. Silver is good, copper works well. Set aside and let them dry, then get your keys and head on down to the hardware store (or rummage around inside your bits-box in the garage).
- Get some dome nuts. These will make the feet. You’ll need two per egg, so make sure you get enough.
- Get some wing nuts. These will make the shoulder joint. Again, two per egg.
- Get some black enamel washers to put underneath the wingnuts.
- Get some normal hexagonal nuts for the eyes. Two per.
- For the eye lens, go for a packet of clear rubber bumpers that you stick on the inside of cupboards to stop them banging. Hang on… these things.
- For the arms, walk to the garden section and look at the micro-fittings. Get some elbows (guess what they’re for?) and some nail-clips.
As for the antenna, find some small screws, scraps of wire, anything that looks ‘robotesque’.

Assembly
Paint your pieces before you assemble. Let them dry. Also, if you want diagrams for this, just let me know.
- Glue your feet on first. The weight in the nuts will help support the egg. Position them a little forward so that the egg has a natural tendency to balance on them.
- Push the nails out from the nail-clips and insert them the wrong way. This makes a claw.
- Assemble the arms – don’t attach them to the egg until they’re dry. Into the wingnut, insert one side of the elbow. If you’ve manage to get the sizes right, you can literally screw it in.
- Insert the nail of the clip into the other end of the elbow, glue it in. Make sure it’s properly dry before you move it. I found the nail wanted to slide out, even when the glue was almost dry.
- Glue wingnut to enamel washer. This will provide a solid surface area to attach the assembly to the egg. Wait until dry.
- Glue arm to robot, somewhere a little forward of centre, so that the balance is still toward the ‘feet’.
- That is the hard part done! Now for the eyes: Glue the hex-nuts in position.
- Peel vinyl stickers and stick the on the eye-nuts. Job done.
- Glue on antenna, let the whole thing dry and, boom! Robot Egg!

Patch Panel
Robots are cute. What’s cuter? A pathetic, bashed up robot. You can add one or two ‘patch-panels’ to the egg. This gives an impression of rustiness, clunkiness, unsophisticatedness (if that’s a word). To do this, get some masking tape and form a rude quadrangle on the back.
Get some slightly off-coloured (or completely dissimilar) paint and daub it on with a sponge to create a textured finish. Mix copper and silver together, or even add gold to make some ‘brass’. This makes your makeshift patch. Let it dry.
Using a very fine paint brush, the back of a paint brush or even some wire, add some ‘dots’ to make rivets, holding the plate on. Dip, dot, dip dot…

With some black paint, add some oil dribbling out the back, or perhaps add rust – green for copper rust, rufus for iron rust. Depends on the primary colour of your egg.
Let it dry and, (second) boom! A sad, pathetic, lovable robot!![]()