You can paint or colour or dye or gloss any old egg – but it helps to get the stuff out of the inside first. Yes, you can hard-boil it, but that’ll only last for so long. If it’s longevity you’re after, you need to blow the eggs.
The General Principle
Imagine a common drinking straw. Now imagine it with fragile, rigid sides. Enlarge the middle, shrink the ends and fill it with eggy goodness, and you’ve got yourself an egg that’s ready to blow.
Apply pressure at the top end, letting the goo get pushed through to the bottom end and out the hole. Collect the albumin and yolk, have a few omelettes.
Clean out the inside of the ‘straw’, let it dry and you’re done.

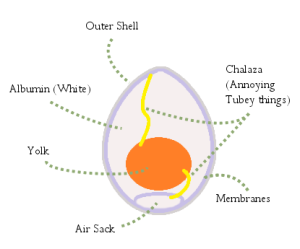
You’re familiar with the white and yolk and shell. What you may not realise it that the membranes, air sack and annoying tubey things called chalaza also play a part when you are blowing.
There’s more to it than that
But, that’s not an egg. An egg doesn’t have holes at the ends! Of course not. You need to make them.
Here’s what you will need:
- An egg – start with a chicken egg
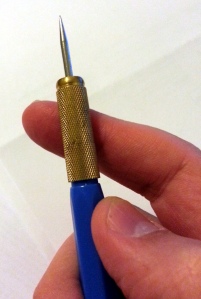
- A strong stylus, needle or sharp-pointy-hole-making-device
- A clean bowl
- A sink and towel to washup

Pick your Eggs
Check your egg for freshness. Really. Nothing worse than a rotten egg spilling its sulphurous contents all over the place. How can you test for freshness? My two main methods are the rattle test and the dunk test. Gently shake the egg from left to right. If it feels like there’s a marble rattling inside, you’ve got a dud.
The other way is to fill a glass with water and pop the egg in. If it sinks, it’s all good. If it floats like a cork, throw it out. If it sinks or rises only slowly, it’s probably still good, so don’t go wasting eggs.
Identify the top and bottom of your egg. The top is the smaller part. The bottom is more rounded. On some eggs, it’s well obvious. Others are so ovoid that it’s actually difficult to tell.
This is important, because of the way eggs are designed – there’s a little air-sac at the bottom of an egg that will obstruct your blowing. Also, the size of the holes you are going to make will be different top and bottom.
Clean your eggs
Blowing eggs requires you to blow with your mouth against the shell. Think about where the egg was made, where it has been. Now get a brush and clean off the shell. Give it a good scrub under water. I’ve never been sick from this, then again, I’ve never not washed my eggs before I began.
This isn’t just for hygiene, you will want to get rid of any poop, feathers, mud, crud or other foreign matter off the shell, so that when you paint, there’s nothing to interfere with your end result.
Ready to get cracking?
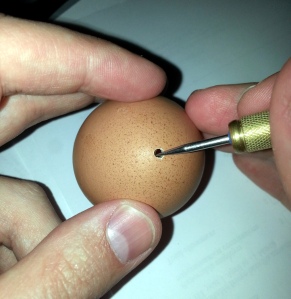
Start with the bottom. Turn your egg upside down, hold your egg gently with your non-dominant hand and apply firm pressure with your stylus to the bottom-most portion of the egg. If you have a sharp point on your stylus, this should make a very small hole. We’ll call this the ‘primary’ hole, because you make it first, it’s the most important to get right and it’s the biggest.
Pull the stylus back out and inspect it. If there are cracks leading away from the hole, you’ve worked it too hard and the structural integrity of the shell has been compromised. That doesn’t mean ‘throw it away’, it means ‘proceed with extreme caution’ – you’ll need to be extra gentle and go slowly to salvage the egg.
No cracks? Good. Now keep the stylus in your hand and slowly, gently, grind down the sides of the hole, enlarging it from a teeny-tiny hole to something about the size of a about 3mm or 1/8″. Go slowly, rub and grind little nibbles rather than push and crack big chunks.

The size of the hole is going to affect three things: The ease with which you can empty the egg, the structural integrity of the egg and the aesthetics afterwards.
Too large and your egg can crack easier as you handle it or apply pressure when blowing. Also, a gaping hole looks ugly if you don’t ‘fill it’ with something.
Too small and you’ll be blowing like Sachmo trying to push the stuff out of the innards.
In my experience, 5mm is the maximum size you’ll want to go, aiming for about 3mm. Next post, I’ll get onto the secondary hole. Sorry to leave you hanging, I won’t be long.


[…] not! A while back I put up a post about how to blow eggs, the ins and outs, pitfalls, and at the end I mentioned that one can use a breast pump to speed up […]