

Making scenes to represent the various parts of Grosvenor Lane Ghost proved harder than I expected. I had, in my mind, a grand set of a horse and carriage, of a row of dilapidated houses, of looking up to see the young boy in the window. Yeah, right.
The problem is that I was reverting to the ‘tell’ rather than the ‘show’, that is, I was telling the story as a movie, scene by scene, rather than showing what the book was about. What I really needed to do was scrap the chapter by chapter approach, getting more into what the message of the book is about.
And what is it about? Science. The introduction of the Protagonist to the world of Paranormology. His first steps into a strange world. The Professor learning to take his own advice and judge a case only after gathering evidence.
With that in mind, I got cracking on making up a few key elements: The equipment, the larder and the laboratory.
The Equipment
Finding an image of an ‘old-school’ thermometer was tricky, since many were large, ungainly contraptions, nothing portable as the Professor would use. I had to be a bit creative, change the gradient to a positive / negative rather than absolute, and add in brass screws for calibration.
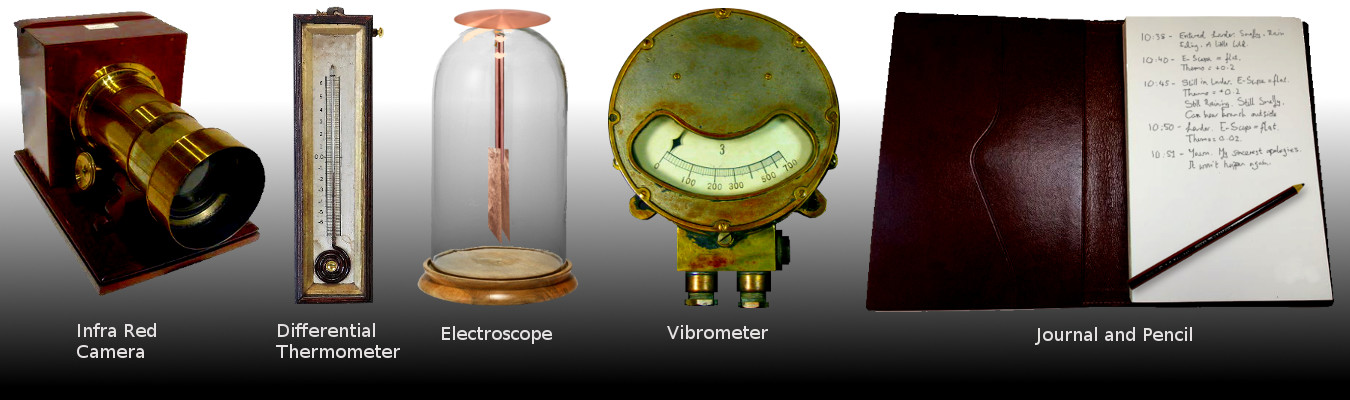
I found many image for an electroscope. Diagrams. Blueprints. None were suitable. So, I had to construct one from a bell jar, a copper rod, a disc and copper sheeting. The vibrometer? Well, that’s actually a high temperature thermometer, but let’s just keep that between you and me, shall we?
I really wanted to get the equipment into the animation since, as the books go on about, any real paranormal investigation require documented, calibrated evidence, not just ‘feelings’ and the like. Plus, a big part of the Professor’s obsession is repeatability, such that his investigations might stand up to peer-review, so his equipment is all important.
The Larder
The Protagonist spends a fair bit of time in the larder, listening to the house, observing his equipment, getting thoroughly bored.
I don’t have a larder in my house. And I don’t have floorboard. And the garage is concrete. So getting a picture of a larder was kind of hard. No problem. Gimp to the rescue! Taking shots of various textures around the house, including an inverted one from underneath the house, cropping, trimming and poking, I was able to assemble a larder.
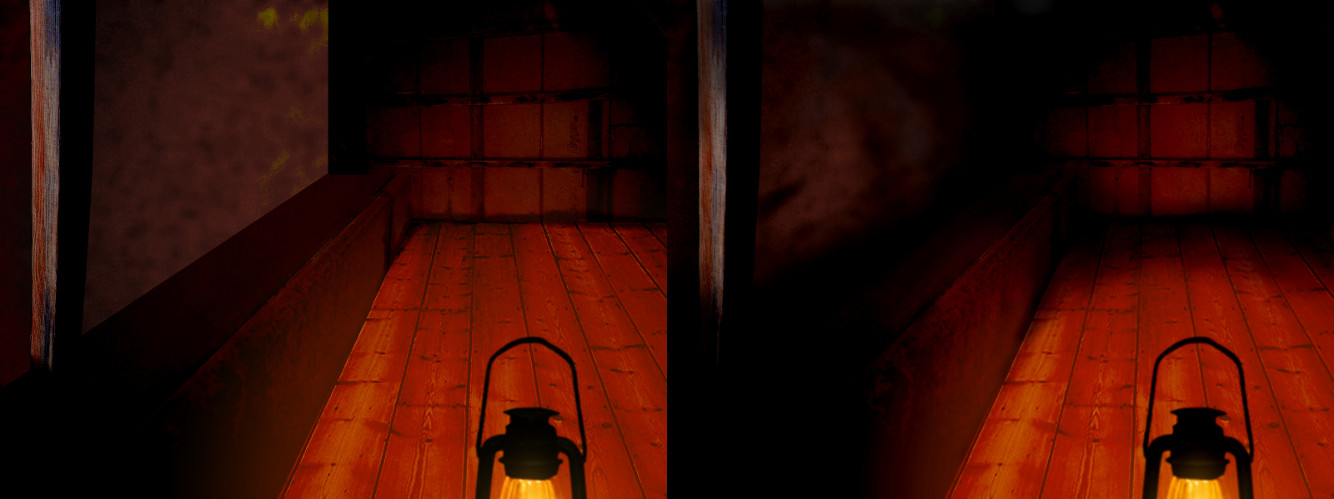
On the left is the larder in the Gimp stage, where I was having issues getting the shadows to play nice. You can see some of the icky-thicky lines around the centre. Meh. On the right is after I got to it using the Wacom Intuit drawing tablet. Applying heavy shadows was made a bazillion times easier. The results is a lot more like what I had in mind.
The Laboratory
Aw, geez. You wouldn’t think it would be too hard to find an old school lantern, light box, prism and holder, easel, and a sheet of paper and tuck them into a laboratory, would you? Well, it was a pain, let me say.
I blurred the background for a sense of depth, constructed the bench out of pieces of wood and scaffolding, found a decent signal lantern (and roughed it up a bit) and put it on top of a box. The result was uninspired. Why? Because everything was ‘different’, that’s why. The box was too clean, the lantern was too old, the paper was too shiny… you get the idea. What I needed to do was make everything a little bit ‘banged up’. Except the prism, since that needed to be an obvious ‘glassy’ element. Not only that, the whole thing was too damned bright. More shadows, more shine. Wacom to the rescue, once more.
Seriously, I’m loving this thing. Still getting the hang of it, of course, early days and all of that. But enough blabbering. I haven’t got the ‘old’ laboratory for comparison for you, my apologies. Let that be a lesson: Hard-drive space is cheap. Don’t delete stuff, move them into separate folders so you can see progressions.
I’m going to get going on some of the other images. Come back soon!![]()