

When you have finished converting your front cover, you need to slap your forehead and say, “Oh, right!”
Why?
Because, unlike eBooks, real books have a spine and a back cover.
Considerations
You’ve got three options when it comes to cover design. Firstly, you can make an image for your back cover, just like your front cover (my preference). You can also use a flat colour or pattern, which isn’t so terrible, really. Lastly, you can use Lulu’s advanced cover editor, which I haven’t had the pleasure of fiddling with yet, but from my understanding it’s a matter of you creating the entire wrap around cover, including spine and safety margins, as a PDF.
For simplicity, I’ll assume you’re making your own back cover image. If you’ve used the Lulu template for the front cover, keep it. The dimensions will be the same. As for the spine, you can set this to a constant colour in the Lulu cover editor afterwards.
Text, Blurb and ISBN
There’s good news and bad news. The good news is that Lulu will insert the ISBN on the back cover for you. That’s a big help, because you know that it will be to standard, it won’t be fudged up with JPG artefact or anti-aliased or anything.
The bad news is that you don’t really get a choice where it lives. For the most part, I don’t care, but you might if you’ve included a graphic in the lower right corner of, only to have it covered by a barcode. Also, it’s black and white with big numbers. That’s the way it has to be. My advice is to put any significant image away from the lower right, and you’ll be fine.
See here, this is the resulting PDF after pushing my bits through Lulu’s online editor (We’ll cover that later):
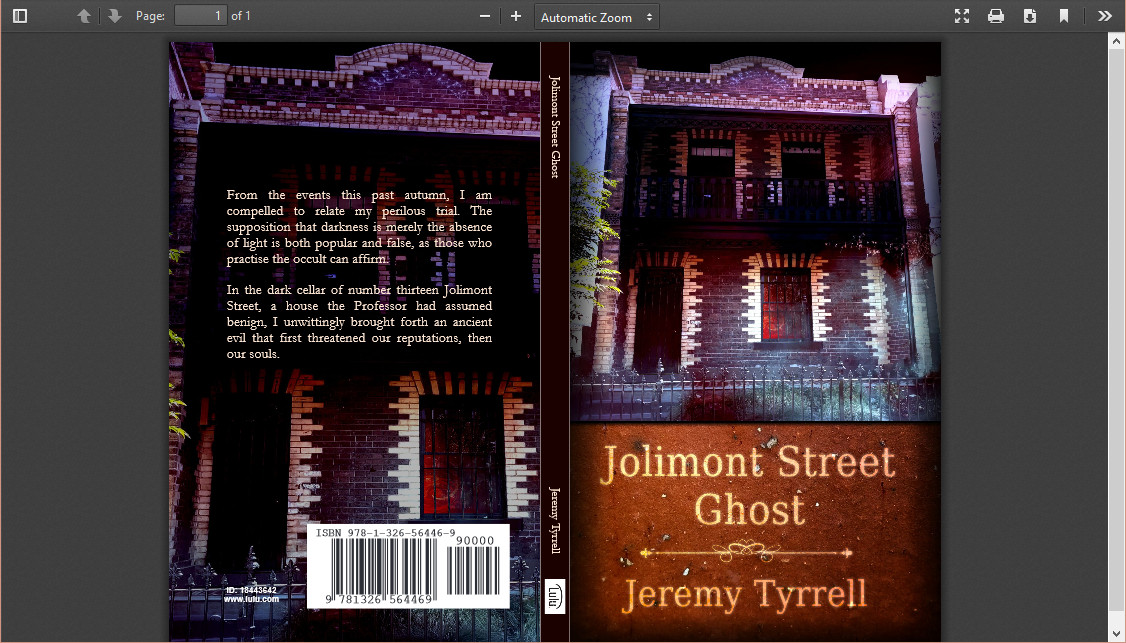
For Jolimont, I’ve taken a zoomed shot of the front cover, lowered the brightness and increased the contrast, so that light text shows up nicely on top. For the spine colour, you can use the colour picker to sample a pixel, or you can type in the RGB colour code.
When it comes to writing a blurb, you don’t need to include this in your image. When you design your cover in Lulu’s online editor, you can have text boxes. Set the font, set the colour, set the alignment, and type away. This is useful in case you’re still teasing your blurb: You don’t want to have to upload a graphic for every minor change.
As for the spine text, Lulu gives you a spot for the title and the author, pre-filled. You only need to adjust the size and font to suit, and you’re good to go.
Lastly, you can insert the Lulu label on the spine (if it’s thick enough) and the Lulu book id on the back (next to the barcode) by clicking the check boxes in the Lulu editor.
So, really, all you need is the front cover image (check!), the back cover image (check!), and the rest you can do online.
If you need to have two tones in the spine, or your own font, or any of that, you’ll need to go with Lulu’s advanced PDF cover upload. Can’t help you there. When I get around to trying it, I’ll let you know how I go, but until then I’m sticking with the online editor.
Whew! What a ride! We’re almost there. After this it’s a matter of uploading all your bits, filling in the blanks and going with Lulu’s Global Reach program to do some of the heavy distribution for you, like getting your book to Amazon and Barnes and Noble.![]()
[…] Your front and back covers […]
[…] is where your hard work shaping the cover will pay off. You’ve made the front and the back cover, in the correct dimensions, so all that’s left to do is upload those two […]